Safety boots manufacturing takes time and planning. Everything must be set up to ensure both comfort and safety to the worker wearing them. Attention to detail is at the heart of the process, from the first pencil stroke to packaged boots. Royer, a prestigious company and industry leader, provides workers with high-quality safety boots. Founded in 1934 in Lac-Drolet, located in the Eastern Townships, Royer opens its doors and shares each work boot’s manufacturing stage.
The 8 steps to building a boot
1. THE DRAWING
Much like a future building needs to have a plan from an architect, work boots must go through a conceptualization phase. The technical drawing will become the base and pillar of the manufacturing process. It will be the reference at each step, from beginning to end.
2. THE MODEL
Once the technical drawing is complete, it is essential to create a three-dimensional version of the product. The shape of the mold or shell allows to construct the actual boot and check the necessary space to ensure foot comfort. Each model requires its own form that will create all dimensions to adapt perfectly to all foot sizes.
3. THE PATTERN
At this step, each piece is prepared to be assembled. First, the technical drawing is affixed to the shell to determine the location of seams and holes. Next, this is how the shape of every piece is defined to create the boot. Finally, they are produced and then submitted to the expert at the next step.
4. THE CUT
Once the pattern is completed, the cutter uses it to perform a precise and uniform cutting of each leather piece that will form the entire boot. The cutter will select the leather according to the part of the boot and depending on the instructions indicated on the technical drawing.
5. THE STITCHING
This stage involves joining together the pieces cut at the previous phase. It is also at this step where the layers of leather are overlaid in their appropriate places. Finally, every part is attached to the front and back of the boot. The completed element is called an “upper”.
6. THE ASSEMBLY
This step is where the safety boot really takes form. The expert begins by gluing the counter and the inner protective toe. The upper is then mounted on the shell defined in Step 2 to fit the boot’s shape. This phase ends when adding the steel or composite shank.
7. THE OUTSOLE
The process is getting toward the end when adding the outsole to the assembled boot. Different methods are used to fix the outsole on the boot, such as vulcanization, polyurethane injection or XPAN, an injected rubber technology that reduces the outsole weight by approximately 50%.
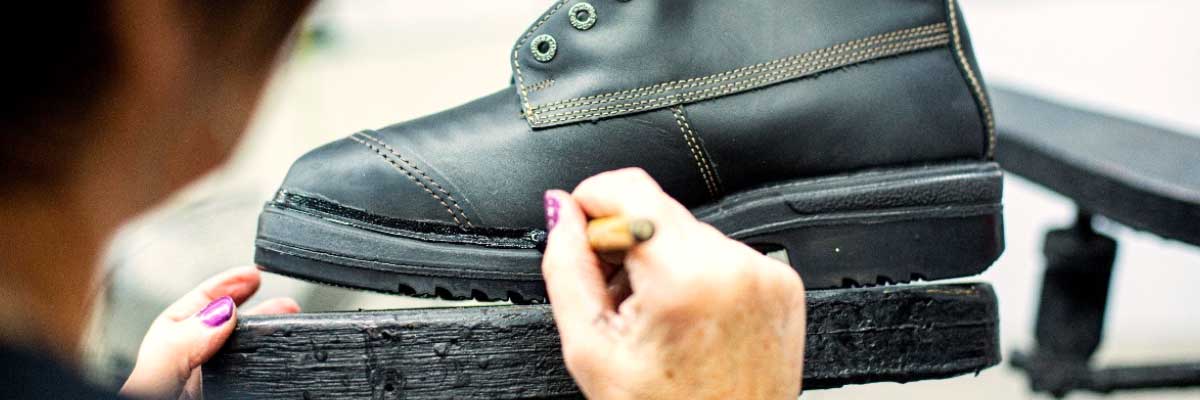
8. THE FINISHING
The journey of the work boot ends at the finishing stage. This is when the final touch-ups are made, and the focus turns to aesthetic details. The footbed, laces, and labels are added before placing the finished boots in their box.
In addition to going through several production stages, an efficient, comfortable, and safe work boot requires the involvement, expertise, and talent of many artisans and specialists. And Royer has long since understood it.
